
Chat Widget - JavaScript SDK
In order to integrate the Shipped AI Chat Widget into your website, please follow these instructions:
Installation
Create a chat widget instance and add the JS SDK right before the closing </head> tag:
<script>
window.addEventListener('shipped:chat-script-loaded', () => {
  const shippedChatWidget = new ShippedAI.ChatWidget({
    integrationId: 'your_integration_id',
    jwt: async (callback) => {
      const jwt = await getJwtFromServer()
      callback(jwt)
    },
  })
})
</script>
<script defer type="module" src="https://js.shippedsuite.com/api/chat-widget.js"></script>
Staging JS SDKFor staging environment, use https://js-staging.shippedsuite.com/api/chat-widget.js
Authentication
You can authenticate the current user by creating getJwtFromServer() function which should return a promise that resolves with the JWT token.
Control the chat widget
To open or close the chat window programmatically use the following methods:
shippedChatWidget.toggle()
shippedChatWidget.open()
shippedChatWidget.close()
To hide or show the chat button programmatically use:
shippedChatWidget.hideChatButton()
shippedChatWidget.showChatButton()
Similarly, to hide or show the entire widget, use:
shippedChatWidget.hide()
shippedChatWidget.show()
To destroy the chat widget instance:
shippedChatWidget.destroy()Hide the chat widget on certain pages
You can keep the chat widget hidden on certain pages using hiddenPaths config option:
const shippedChatWidget = new ShippedAI.ChatWidget({
  // Specify paths where the chat widget should be hidden
  hiddenPaths: [
    '/contact/', // Exact path match
    '*about*', // Wildcard pattern - hides on any path containing 'about'
    '/faq*',  // Wildcard pattern - hides on any path starting with /faq
    new RegExp('^/help/.*$'), // RegExp object - hides on any path starting with /help/
  ]
})
Conversation Disclaimer
Use conversationDisclaimer to show a blocking notice above the composer until the visitor agrees.
- Type:
string(optional, Markdown-enabled) - Default:
''(disabled)
const widget = new window.ShippedAI.ChatWidget({
  conversationDisclaimer: 'This conversation may be monitored and recorded. See our [Privacy Policy](https://example.com/privacy).',
})
Control widget visibility percentage
You can control what percentage of users see the chat widget using visibilityPercentage. This is useful for gradual rollouts or A/B testing:
const shippedChatWidget = new ShippedAI.ChatWidget({
  visibilityPercentage: 25, // Show widget to only 25% of users
})
The visibility is calculated deterministically based on the user's session ID, ensuring the same user always sees the same result. Use 100 (default) to show to all users, or 0 to hide from all users.
Add custom CSS
  const shippedChatWidget = new ShippedAI.ChatWidget({
    customCSS: ".chat-widget { bottom: 50px !important; } .chat-window { height: calc(100vh - 10em); }"
  })
})
Customer data collection form for unauthenticated users
By default, unauthenticated customers are asked to provide their name and email before starting a conversation.
You can customize the form’s title and description:
const shippedChatWidget = new ShippedAI.ChatWidget({
  customerDataConfig: {
    title: "Welcome! Let's get started",
    description: 'This helps us provide better support',
  },
})
To prevent the form from being shown to customers, you can disable it:
const shippedChatWidget = new ShippedAI.ChatWidget({
  requireCustomerData: false,
})
Feedback Data Collection
By default, the chat widget collects user feedback through like/dislike buttons on AI responses and
conversation ratings when chats end. This helps improve the AI assistant's performance and provides
valuable insights.
You can disable all feedback collection features if needed:
const shippedChatWidget = new ShippedAI.ChatWidget({
  enableFeedbackCollection: false,
})
When feedback collection is disabled:
- Like/dislike buttons are hidden on AI responses
- Conversation rating prompts are not shown
- Users see a simple "Thanks for chatting with us!" message when conversations end
Multiple subdomains support
By default, the chat widget uses local storage to keep user state.
However, if you use the chat widget on different subdomains, you'll need to enable cookie storage:
const shippedChatWidget = new ShippedAI.ChatWidget({
  useCookieStorage: true,
  cookieDomain: 'your-main-domain.com',
})
cookieDomain must be set when useCookieStorage is true
Theme & Appearance
For Shopify, you can set the company logo and colors in Shipped Suite merchant admin:
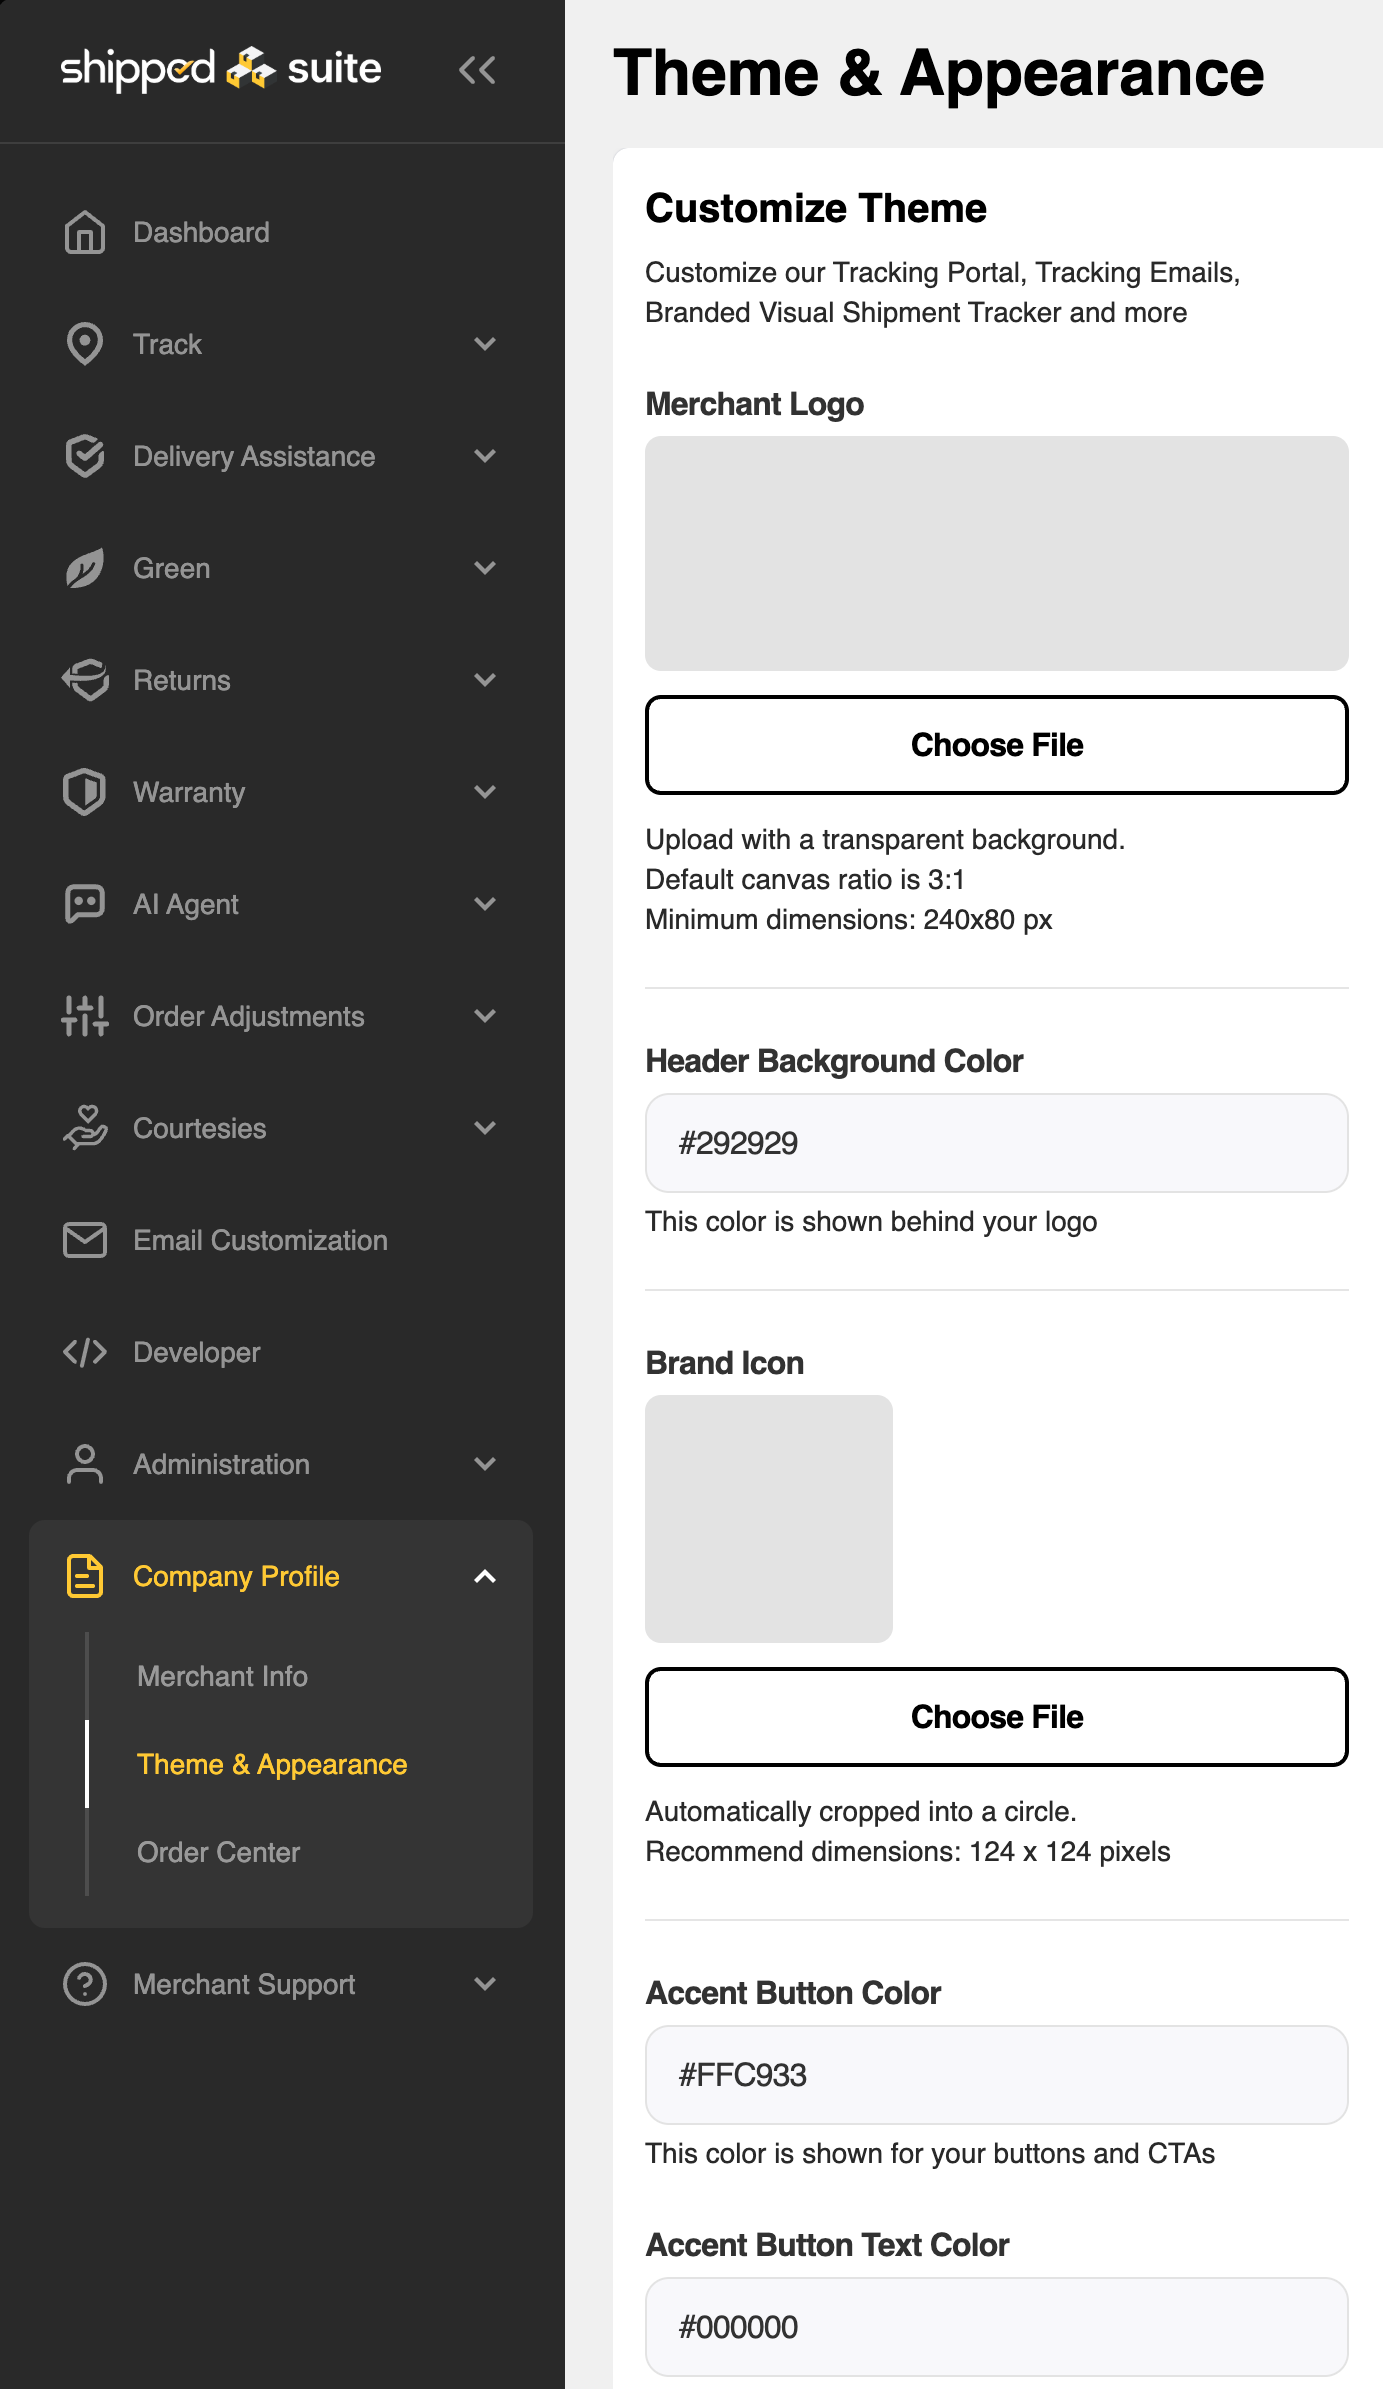
The colors can also be set directly in the chat widget instance config (these will override the values set above):
const shippedChatWidget = new ShippedAI.ChatWidget({
  theme: {
    text_color: '#000',
    accent_color: '#3164f6',
    accent_text_color: '#fff',
  },
})
Shopify Headless authentication
// an example function that reads the user token from a cookie
function getCookieToken(name) {
  var match = document.cookie.match(new RegExp("(^| )" + name + "=([^;]+)"));
  if (!match) return null;

  try {
    var decodedValue = decodeURIComponent(match[2]);
    var parsedValue = JSON.parse(decodedValue);
    return parsedValue.token ? parsedValue.token : null;
  } catch (e) {
    return null;
  }
}

window.addEventListener("shipped:chat-script-loaded", () => {
  new ShippedAI.ChatWidget({
    integrationId: "your_integration_id",

    // perform customer JWT authentication
    jwt: async () => {
      const customerAccessToken = getCookieToken("user-profile");
      if (!customerAccessToken) return null;

      return await ShippedAI.getShopifyHeadlessJWT(
        customerAccessToken,
        "your_storefront_token"
      );
    },
  });
});
Content Security Policy
If your site enforces a Content Security Policy, whitelist the hosts used by the Chat Widget SDK so it can load scripts, report errors, and establish real-time connections.
https://js.shippedsuite.com– serves the widget’s JavaScript bundlehttps://app.shippedapp.co– powers authenticated API calls from the widgethttps://api.rollbar.com– sends client-side error telemetrywss://*.twilio.com– maintains the WebSocket session required for live messaging
Example directive update:
script-src ... https://js.shippedsuite.com https://app.shippedapp.co https://api.rollbar.com;
connect-src ... https://app.shippedapp.co https://api.rollbar.com wss://*.twilio.com;
Best Practices
- Use the
shipped:chat-script-loadedevent to ensure the SDK is fully loaded before initializing - Implement proper error handling in your JWT callback function
- Use hidden paths to prevent the chat widget from appearing on checkout or other sensitive pages
- Test thoroughly with your specific e-commerce platform integration
Common Issues
- Chat widget not appearing: Ensure the script is loaded and the
shipped:chat-script-loadedevent is fired - Authentication errors: Check that your JWT callback is returning a valid token
- Hidden paths not working: Verify the path patterns match your URL structure
Updated 7 months ago